简介
sharp-excel 是一个操作Excel、Word工具的java实现。依赖apache的 POI。目前只开发了Excel的部分,Word部分还没有实现。
pom.xml
<dependency>
    <groupId>com.rick.office</groupId>
    <artifactId>sharp-excel</artifactId>
    <version>1.0-SNAPSHOT</version>
    <scope>compile</scope>
</dependency>
设计的理念是定(x, y)坐标,然后写数据
方法测试
在指定的坐标位置,写入数据
单元格数据
@Test
public void testCell() throws IOException {
File file = new File("/Users/rick/Documents/3.xlsx");
ExcelWriter excelWriter = new ExcelWriter();
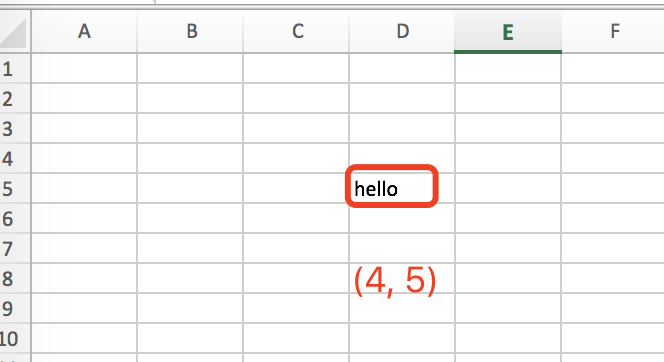
excelWriter.writeCell(new ExcelCell(4, 5, "hello"));
excelWriter.toFile(new FileOutputStream(file));
}
在坐标(4, 5)的单元格写入「hello」
行数据
@Test
public void writeRow() throws IOException {
File file = new File("/Users/rick/Documents/9.xlsx");
ExcelWriter excelWriter = new ExcelWriter();
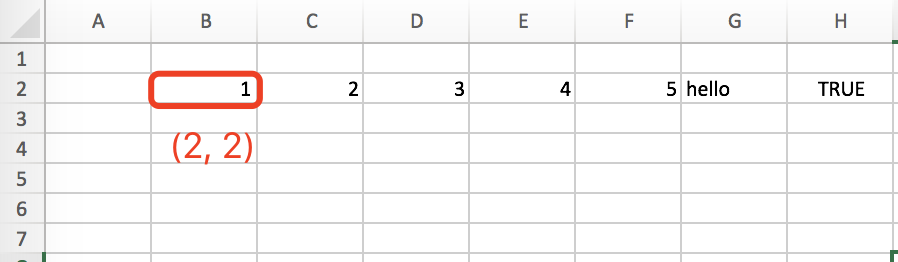
excelWriter.writeRow(new ExcelRow(2,2, new Object[] {1, 2, 3, 4, 5, "hello", true}));
excelWriter.toFile(new FileOutputStream(file));
}
从坐标是(2, 2) 的位置开始,写入「一行」数据:1, 2, 3, 4, 5, “hello”, true
列数据
@Test
public void writeColumn() throws IOException {
File file = new File("/Users/rick/Documents/8.xlsx");
ExcelWriter excelWriter = new ExcelWriter();
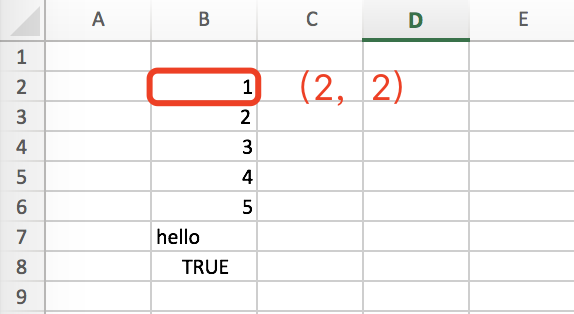
excelWriter.writeColumn(new ExcelColumn(2,2, new Object[] {1, 2, 3, 4, 5, "hello", true}));
excelWriter.toFile(new FileOutputStream(file));
}
从坐标是(2, 2) 的位置开始,写入「一列」数据:1, 2, 3, 4, 5, “hello”, true
合并单元格
@Test
public void testWriteMerge() throws IOException {
File file = new File("/Users/rick/Documents/0.xlsx");
ExcelWriter excelWriter = new ExcelWriter();
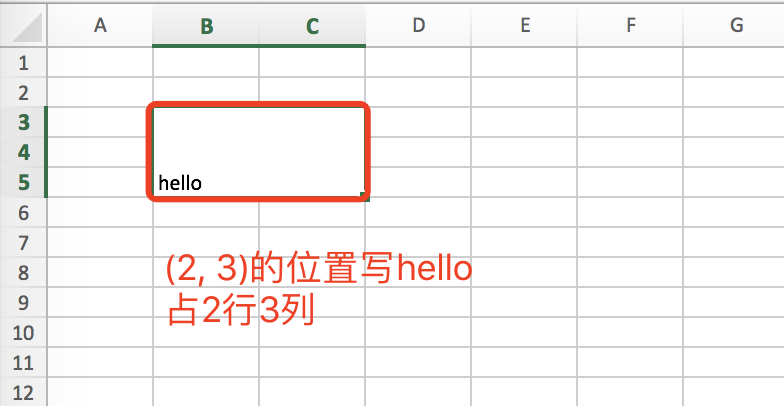
ExcelCell cell = new ExcelCell(2, 3, "hello");
cell.setRowSpan(3);
cell.setColSpan(2);
excelWriter.writeCell(cell);
excelWriter.toFile(new FileOutputStream(file));
}
在坐标(2, 3)的单元格写入「hello」,占3行2列
设置样式
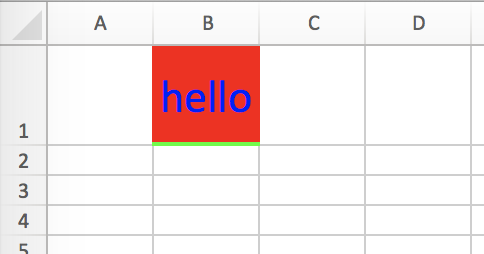
单元格
@Test
public void testWriteCellWithStyle() throws IOException {
    File file = new File("/Users/rick/Documents/3.xlsx");

    ExcelWriter excelWriter = new ExcelWriter();

    ExcelCell cell = new ExcelCell(2,1, "hello");

    cell.setHeightInPoints(50f);
    cell.setStyle(createStyle(excelWriter.getBook()));

    excelWriter.writeCell(cell);

    excelWriter.toFile(new FileOutputStream(file));
}
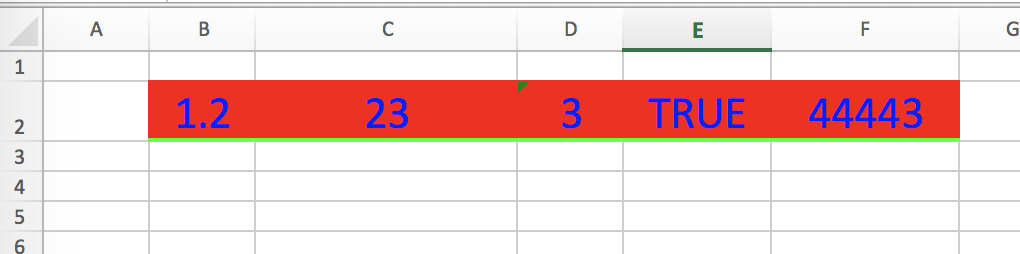
行
@Test
public void testWriteRowWithStyle() throws IOException {
    File file = new File("/Users/rick/Documents/3.xlsx");

    ExcelWriter excelWriter = new ExcelWriter();

    excelWriter.getActiveSheet().setColumnWidth(2, 5600);

    ExcelRow row = new ExcelRow(2,2, new Object[] {1.2d, 23, "3", true, LocalDate.now()});
    row.setStyle(createStyle(excelWriter.getBook()));
    excelWriter.writeRow(row);

    excelWriter.toFile(new FileOutputStream(file));
}
列
同行设置
复杂例子
@Test
public void testComplex() throws IOException {
    File file = new File("/Users/rick/Documents/7.xlsx");
    ExcelWriter excelWriter = new ExcelWriter();

    ExcelCell cell1 = new ExcelCell(1,1, "国内仓");
    cell1.setColSpan(3);
    cell1.setStyle(createStyle(excelWriter.getBook()));

    ExcelCell cell2 = new ExcelCell(4,1, "香港仓");
    cell2.setRowSpan(2);
    cell2.setStyle(createStyle(excelWriter.getBook()));

    ExcelCell cell3 = new ExcelCell(5,1, "香港直运仓");
    cell3.setRowSpan(2);
    cell3.setStyle(createStyle(excelWriter.getBook()));

    ExcelCell cell4 = new ExcelCell(6,1, "供应链未完成数量");
    cell4.setRowSpan(2);
    cell4.setStyle(createStyle(excelWriter.getBook()));

    ExcelRow row1 = new ExcelRow(1, 2, new Object[] {"苏州成品仓", "苏州样品仓", "深圳成品仓"});
    row1.setStyle(createStyle(excelWriter.getBook()));

    ExcelRow row2 = new ExcelRow(1, 3, new Object[] {"50", "0", "1"});
    row2.setStyle(createStyle(excelWriter.getBook()));

    ExcelCell cell5 = new ExcelCell(1,4, "国内仓锁货数量");
    cell5.setColSpan(3);
    cell5.setStyle(createStyle(excelWriter.getBook()));

    ExcelCell cell6 = new ExcelCell(1,5, "9");
    cell6.setColSpan(3);
    cell6.setStyle(createStyle(excelWriter.getBook()));

    ExcelCell cell7 = new ExcelCell(4,3, "29");
    cell7.setRowSpan(3);
    cell7.setStyle(createStyle(excelWriter.getBook()));

    ExcelCell cell8 = new ExcelCell(5,3, "39");
    cell8.setRowSpan(3);
    cell8.setStyle(createStyle(excelWriter.getBook()));

    ExcelCell cell9 = new ExcelCell(6,3, 88);
    cell9.setRowSpan(3);
    cell9.setStyle(createStyle(excelWriter.getBook()));

    ExcelColumn column = new ExcelColumn(7, 1, new Object[] {"新增", "2", "23", 23, 34.2f});
    column.setStyle(createStyle(excelWriter.getBook()));

    excelWriter.writeCell(cell1);
    excelWriter.writeCell(cell2);
    excelWriter.writeCell(cell3);
    excelWriter.writeCell(cell4);
    excelWriter.writeCell(cell5);
    excelWriter.writeCell(cell6);
    excelWriter.writeCell(cell7);
    excelWriter.writeCell(cell8);
    excelWriter.writeCell(cell9);
    excelWriter.writeRow(row1);
    excelWriter.writeRow(row2);
    excelWriter.writeColumn(column);

    excelWriter.getActiveSheet().setColumnWidth(0, 5600);
    excelWriter.getActiveSheet().setColumnWidth(1, 5600);
    excelWriter.getActiveSheet().setColumnWidth(2, 5600);
    excelWriter.getActiveSheet().setColumnWidth(3, 5600);
    excelWriter.getActiveSheet().setColumnWidth(4, 5600);
    excelWriter.getActiveSheet().setColumnWidth(5, 5600);
    excelWriter.getActiveSheet().setColumnWidth(6, 5600);

    excelWriter.toFile(new FileOutputStream(file));

}

private XSSFCellStyle createStyle(XSSFWorkbook book) {

    XSSFCellStyle cellStyle = book.createCellStyle();
    // 定义颜色
    XSSFColor color = new XSSFColor(Color.black, new DefaultIndexedColorMap());

    // 设置边框(合并这个不生效) 需要单独在CellRangeAddress设置
    cellStyle.setBorderLeft(BorderStyle.THIN);
    cellStyle.setBorderRight(BorderStyle.THIN);
    cellStyle.setBorderTop(BorderStyle.THIN);
    cellStyle.setBorderBottom(BorderStyle.THIN);

    cellStyle.setBorderColor(XSSFCellBorder.BorderSide.LEFT, color);
    cellStyle.setBorderColor(XSSFCellBorder.BorderSide.RIGHT, color);
    cellStyle.setBorderColor(XSSFCellBorder.BorderSide.TOP, color);
    cellStyle.setBorderColor(XSSFCellBorder.BorderSide.BOTTOM, color);

    // 水平居中
    cellStyle.setAlignment(HorizontalAlignment.CENTER);
    // 垂直居中
    cellStyle.setVerticalAlignment(VerticalAlignment.CENTER);

    return cellStyle;
}

POI原生实现例子
@Test
public void testNative() throws IOException {
    File file = new File("/Users/rick/Documents/2.xlsx");

    XSSFWorkbook book = new XSSFWorkbook();
    XSSFSheet sheet = book.createSheet("sheet-rick");

    // 设置第一列的框
    sheet.setColumnWidth(0, 3766);

    XSSFRow row = sheet.createRow(0);


    // 设置高度
    row.setHeightInPoints(24);
//        row.setRowStyle();
    XSSFCell cell = row.createCell(1);
    cell.setCellValue("hello");
//        cell.setCellStyle();


    XSSFCellStyle cellStyle = book.createCellStyle();

    // 定义颜色
    XSSFColor color = new XSSFColor(java.awt.Color.BLUE, new DefaultIndexedColorMap());
    XSSFColor color2 = new XSSFColor(Color.RED, new DefaultIndexedColorMap());
    XSSFColor color3 = new XSSFColor(Color.GREEN, new DefaultIndexedColorMap());

    // 填充色
    cellStyle.setFillForegroundColor(color2);
    cellStyle.setFillPattern(FillPatternType.SOLID_FOREGROUND);

    // 文字色
    XSSFFont font = book.createFont();
    font.setColor(color);
    cellStyle.setFont(font);

    // 设置边框(合并这个不生效) 需要单独在CellRangeAddress设置
//        cellStyle.setBorderBottom(BorderStyle.MEDIUM);
//        cellStyle.setBorderColor(XSSFCellBorder.BorderSide.BOTTOM, color3);

    // 水平居中
    cellStyle.setAlignment(HorizontalAlignment.CENTER);
    // 垂直居中
    cellStyle.setVerticalAlignment(VerticalAlignment.CENTER);

    // 设置样式
    cell.setCellStyle(cellStyle);

    // 合并单元格
    CellRangeAddress region = new CellRangeAddress(0, 1, 1, 2);
    sheet.addMergedRegion(region);

    //
    System.out.println(cellStyle.getBorderBottom() == BorderStyle.NONE);
    setRegionStyle(sheet, region);

    book.write(new FileOutputStream(file));
    book.close();

}

/**
 * 设置边框
 //  * @param region
 */
 private void setRegionStyle(XSSFSheet sheet, CellRangeAddress region) {
    //全部完成之后
    XSSFRow xrow = (XSSFRow) CellUtil.getRow(region.getFirstRow(), sheet);
    XSSFCell xccell = (XSSFCell) CellUtil.getCell(xrow, region.getFirstColumn());

    XSSFCellStyle style = xccell.getCellStyle();

    for (int i = region.getFirstRow(); i <= region.getLastRow(); i++) {
        XSSFRow row = (XSSFRow) CellUtil.getRow(i, sheet);
        for (int j = region.getFirstColumn(); j <= region.getLastColumn(); j++) {
            XSSFCell cell = (XSSFCell) CellUtil.getCell(row, j);
            cell.setCellStyle(style);
            System.out.println("-----");
        }
    }
 }