Django初体验
教程:http://www.runoob.com/django/django-tutorial.html
省略安装过程
Python下有许多款不同的 Web 框架。Django是重量级选手中最有代表性的一位。许多成功的网站和APP都基于Django。
Django是一个开放源代码的Web应用框架,由Python写成。
Django遵守BSD版权,初次发布于2005年7月, 并于2008年9月发布了第一个正式版本1.0 。
Django采用了MVC的软件设计模式,即模型M,视图V和控制器C。
- 创建工程
django-admin startproject mysite
生成目录结构
    |-mysite
        |-urls.py
        |-settings.py
        |-wsgi.py
        |-__init__.py
     |-manage.py
启动服务
D:\workspace\mysite>python manage.py runserver
Performing system checks...

System check identified no issues (0 silenced).
December 27, 2015 - 21:27:18
Django version 1.9, using settings 'mysite.settings'
Starting development server at http://127.0.0.1:8000/
Quit the server with CTRL-BREAK.
- 添加模块
django startapp blog
生成目录结构
    |-blog
        |-__init__.py
        |-admin.py
        |-apps.py
        |-models.py
        |-tests.py
        |-view.py
    |-mysite
        |-urls.py
        |-settings.py
        |-wsgi.py
        |-__init__.py
     |-manage.py
a. 配置模块 settings.py
INSTALLED_APPS = [
    'django.contrib.admin',
    'django.contrib.auth',
    'django.contrib.contenttypes',
    'django.contrib.sessions',
    'django.contrib.messages',
    'django.contrib.staticfiles',
    'blog'
]
b. 配置数据库
DATABASES = {
    'default': {
        'ENGINE': 'django.db.backends.mysql',
        'NAME': 'rtest',
        'USER': 'rick',
        'PASSWORD': 'jkxyx@05',
        'HOST':'192.168.1.105',
        'PORT':'3306',
    }
}
c. 添加模板文件夹
'DIRS': [BASE_DIR+"/templates"],
- 编写blog模块
a. 创建实体类Article
models.py
from __future__ import unicode_literals
from django.db import models
# Create your models here.

class Article(models.Model):
    title = models.CharField(max_length=20)
    author = models.CharField(max_length=20)
    content = models.CharField(max_length=20)
执行脚本自动创建数据库
D:\workspace\mysite>python manage.py makemigrations
No changes detected
D:\workspace\mysite>python manage.py migrate
Operations to perform:
  Apply all migrations: admin, blog, contenttypes, auth, sessions
Running migrations:
  Rendering model states... DONE
  Applying contenttypes.0001_initial... OK
  Applying auth.0001_initial... OK
  Applying admin.0001_initial... OK
  Applying admin.0002_logentry_remove_auto_add... OK
  Applying contenttypes.0002_remove_content_type_name... OK
  Applying auth.0002_alter_permission_name_max_length... OK
  Applying auth.0003_alter_user_email_max_length... OK
  Applying auth.0004_alter_user_username_opts... OK
  Applying auth.0005_alter_user_last_login_null... OK
  Applying auth.0006_require_contenttypes_0002... OK
  Applying auth.0007_alter_validators_add_error_messages... OK
  Applying blog.0001_initial... OK
  Applying sessions.0001_initial... OK
b. 创建视图
views.py
from django.shortcuts import render
from django.http import HttpResponse
from blog.models import Article

def hello(request):

    list = Article.objects.all()
    #print list
    #for art in list:
    #    print art.title
    context = {}
    context['object_list'] = list
    return render(request, 'hello.html', context)
hello.html
<!DOCTYPE html>
<html lang="en">
<head>
<meta charset="UTF-8">
<title>hello</title>
</head>
<body>
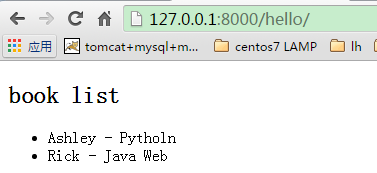
<h2>book list</h2>
<ul>
{% for article in object_list %}
<li>{{ article.author }} - {{ article.title }}</li>
{% endfor %}
</ul>
</body>
</html>
urls.py
urlpatterns = [
    url(r'^admin/', admin.site.urls),
    url(r'^hello/', hello),
]
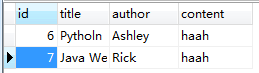
数据库插入测试数据
访问地址:http://127.0.0.1:8000/hello/