var http = require('http')
var mysql = require('mysql')

var connection = mysql.createConnection({
    host: '121.42.151.190',
    user: 'root',
    password: 'jkxyx205',
    database: 'medical'
})


http.createServer(function(req, res) {

    if ("/favicon.ico" !== req.url) {
        res.writeHeader(200, {"Content-Type": "text/plain"})

        connection.query("SELECT username, truename, email, mobile FROM user where id = '160' or id = '169'",
            function(err, rows, fields) {

                rows.forEach(function(item) {
                    console.log(item.username);
                })

                res.write(JSON.stringify(rows));

                res.end()
            })
    }

}).listen(3000)

console.log("server start at port 3000... ");
作者归档:Rick
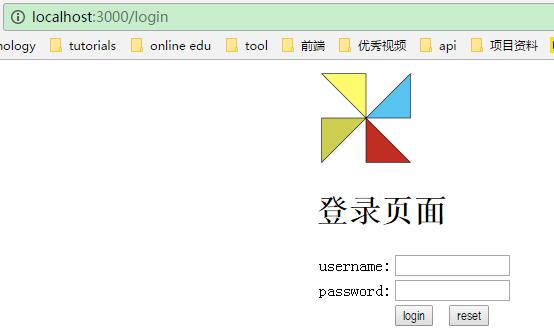
Node小练习:自定义路由
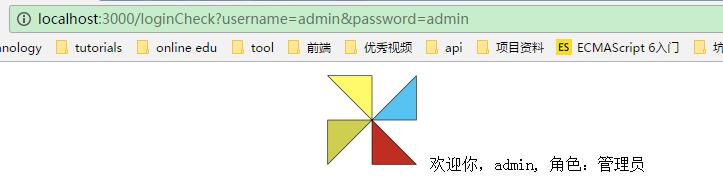
注册页面login.html, 通过用户名和密码验证成功后,跳向内容页index.html。index.html页面动态显示内容:admin 管理员
login.html
<!DOCTYPE html>
<html lang="en">
<head>
<meta charset="UTF-8">
<title>登录页面</title>
<style>
div.content {
width: 500px;
margin: 0 auto;
}
</style>
</head>
<body>
<div class="content">
<img src="../static/images/3.png" alt="">
<h1>登录页面</h1>
<form action="/loginCheck">
<table>
<tr>
<td>username:</td>
<td><input name="username"/></td>
</tr>
<tr>
<td>password:</td>
<td><input name="password"/></td>
</tr>
<tr>
<td></td>
<td><input type="submit" value="login"> <input type="reset" value="reset"></td>
</tr>
</table>
</form>
</div>
</body>
</html>
index.html
<!DOCTYPE html>
<html lang="en">
<head>
    <meta charset="UTF-8">
    <title>内容页面</title>
    <style>
        div.content {
            width: 500px;
            margin: 0 auto;
        }
    </style>
</head>
<body>

    <div class="content">
        <img src="../static/images/3.png" alt="">
        欢迎你,${username}, 角色:${ role }
    </div>
</body>
</html>
server.js
var http = require('http')
var url = require('url');

var Router = require('./router') //自定义路由模块


http.createServer(function(req, res) {
    if ("/favicon.ico" !== req.url) {
        try {
            Router.setErrorPage('./app/404.html');

            Router.map({
                '/login': {
                    'tpl':'./app/login.html'
                },
                '/loginCheck': {
                    'tpl':'./app/index.html',
                    'action': function(query) {
                        if (query['username'] === 'admin' && query['password'] === 'admin') {
                             this.data = query;
                             this.data.role = '管理员';
                             return true;
                        }
                        return '/login';
                     }
                }
            }, req, res);
        } catch(err) {
            res.writeHeader(200, {'content-Type': 'image/jpeg','charset': 'utf-8' });
            res.write('500 error');
        }

    }
    res.end('')
}).listen(3000)

console.log('server listen at ' + 3000);
router.js
var url = require('url')
const fs = require('fs');
var path = require('path');

var ROOT_PATH = path.resolve(__dirname);

module.exports = {
    setErrorPage(errorPage) { //设置错误页面
        this.errorPage = errorPage;
    },
    map: function(mapping, req, res) {
        var pathname = url.parse(req.url).pathname;
        if (/\.png$/.test(pathname)) { //处理图片
            res.writeHeader(200, {'content-Type': 'image/jpeg','charset': 'utf-8' });
            var img = ROOT_PATH + pathname;
            //If the encoding option is specified then this function returns a string. Otherwise it returns a buffer.
            var data = fs.readFileSync(img);
            res.write(data);
        } else { //处理页面
            res.writeHeader(200, {'content-Type': 'text/html','charset': 'utf-8' });

            var obj = mapping[pathname];

            var tpl = this.errorPage;

            var query = url.parse(req.url, true).query;

            var flag = (!obj.action) || obj.action(query); //回调函数

            if (obj && flag) {
                tpl = (flag === true ? obj.tpl : mapping[flag].tpl);
            }

            var html = fs.readFileSync(tpl, "utf-8");
            if (obj.data) { //动态网页
                for (var p in obj.data) {

                    var regExp = new RegExp("\\$\\{\\s*"+p+"\\s*\\}","gi");
                    html = html.replace(regExp,obj.data[p]);
                }
            }
            res.write(html);
        }

    }
}
学习css中的宽度 px em rem
今天学习了css中的宽度,记录一下。
* px像素(Pixel)绝对长度单位。像素px是相对于显示器屏幕分辨率而言的;
* em是相对长度单位。相对于当前对象内文本的字体尺寸。如当前对行内文本的字体尺寸未被人为设置,则相对于浏览器的默认字体尺寸。(引自CSS2.0手册)
* rem是CSS3中新添加的,相对于根的比例,但相对的只是HTML根元素
<!DOCTYPE html>
<html lang="en">
<head>
    <meta charset="UTF-8">
    <title></title>
    <style>
        html {
            /*1.  最小的字体大小是12px,默认的字体大小是16px*/
            font-size: 62.5%;  /*16px 62.5% = 10px */
        }

        #d {
            font-size: 10em;  /*10 x 10px = 100px  */
            width: 100px;
            background-color: red;
        }
        #p1 {
            font-size: 2rem;
        }
        #p2 {
            font-size: 25px; /*固定宽度*/
        }
    </style>
</head>
<body>
    <div id="d">
        hello div
        <p id="p1">
            hello p1
        </p>
        <p id="p2">
            hello p2
        </p>
    </div>
    <script>
       var div = document.getElementById('d')
       var p1 = document.getElementById('p1')
       var p2 = document.getElementById('p2')
       alert(getComputedStyle(div,false).fontSize) //100px 相对于父元素的10倍
       alert(getComputedStyle(p1,false).fontSize)    //20px 相对于跟元素的2倍
       alert(getComputedStyle(p2,false).fontSize)    //固定宽度25px
    </script>
</body>
</html>
所以我们在写CSS的时候,需要注意两点:
-
1 . html选择器中声明Font-size=62.5%;
-
2 . 将你的原来的px数值除以10,然后换上em作为单位;
等比例缩放页面小工具
有这样一个需求,需要将一个页面等比例缩放,适应不同分辨率下的展示效果。
例如:在800×600下显示的某div的宽度是100px;在1024×768下div的宽度要200px。
原来的html
<!DOCTYPE html>
<html lang="en">
<head>
    <meta charset="UTF-8">
    <title></title>
    <style>
        .hh {
            font-size: 18px;
            width: 100px;
            background-color: #f0f;
        }
        </style>
</head>
<body>
    <div>
        <span style="font-size: 12px;">哈哈</span>
        <div class="hh">
            呵呵
        </div>
    </div>
</body>
</html>
放大2倍后的html
<!DOCTYPE html>
<html lang="en">

  <head>
    <meta charset="UTF-8" />
    <title></title>
    <style>
    .hh {
        font-size: 36px;
         width: 200px;
         background-color: #f0f;
     }
    </style>
    </head>

  <body>
    <div>
      <span style="font-size: 24px;">哈哈</span>
      <div class="hh">呵呵</div></div>
  </body>

</html>
java工具类
package mysqlTest;

import java.io.BufferedReader;
import java.io.BufferedWriter;
import java.io.File;
import java.io.FileInputStream;
import java.io.FileOutputStream;
import java.io.InputStreamReader;
import java.io.OutputStreamWriter;


public class Reversor2 {
    public static String[] LENGTH_UNIT = {"pt", "px"};


    public static void main(String[] args) {
        try {
            String pathname = "D:\\www\\static\\zxd.html";
            File filename = new File(pathname);
            InputStreamReader reader = new InputStreamReader(
                    new FileInputStream(filename), "utf-8");
            BufferedReader br = new BufferedReader(reader);

            StringBuilder res = new StringBuilder();
            String line = "";

            while ((line = br.readLine()) != null) {
                if (line != null && !line.equals("")) {
                    res.append(line);
                }
            }
            br.close();

            String html = dealWithLine(res.toString(), 2); //放大2倍
            File writename = new File("D:\\www\\zx\\zx-1.html"); // 相对路径,如果没有则要建立一个新的output。txt文件
            writename.createNewFile(); // 创建新文件
            BufferedWriter out = new BufferedWriter(new OutputStreamWriter(new FileOutputStream(writename),"utf-8"));
            out.write(html);
            out.flush(); // 把缓存区内容压入文件
            out.close(); // 最后记得关闭文件


        } catch (Exception e) {
            e.printStackTrace();
        }
    }

    public static String dealWithLine(String str, float scale) {
        char[] cs = str.toCharArray();
        StringBuilder sb = new StringBuilder();

        boolean isChecking = false;
        String checkBox = "";
        int len = cs.length;
        for (int i = 0; i < len; i++) {
            char c = cs[i];
            if ((c >= 48 && c <= 57) || c == 46) {
                isChecking = true;
                checkBox += c;
            } else {
                if (isChecking && i < len-1) {
                    for (String unit : LENGTH_UNIT) {
                        if ((c + "" + cs[i+unit.length()-1]).equals(unit)) {
                            checkBox = subZeroAndDot((Float.parseFloat(checkBox) * scale) + "");
                        }
                    }
                }
                sb.append(checkBox += c);
                checkBox = "";
                isChecking =  false;

            }

        }
        sb.append(checkBox);

        return sb.toString();
    }


    /**
     * 使用java正则表达式去掉多余的.与0
     * @param s
     * @return
     */
    public static String subZeroAndDot(String s){
        if(s.indexOf(".") > 0){
            s = s.replaceAll("0+?$", "");//去掉多余的0
            s = s.replaceAll("[.]$", "");//如最后一位是.则去掉
        }
        return s;
    }

}
使用 vue-cli 开发多页应用(三)
使用 vue-cli 开发多页应用改webpack的配置,多入口即可。相当于多个单页面入口,这个时候你需要解决的问题,是如何webApp-A 跳转到 webApp-B 因为两个路由是不共用的---------- 这部分交给 nginx 去解决。
添加一个单页面
假设你现在需要点击一个页面index2.html,对应的入库是main2.js
全局配置
- 修改
webpack.base.conf.js
entry: {
    app: './src/main.js',
    app2: './src/main2.js',
},
运行、编译的时候每一个入口都会对应一个
Chunk
run dev 开发环境
- 修改
webpack.dev.conf.js
打开 buildwebpack.dev.conf.js ,在plugins下找到new HtmlWebpackPlugin,在其后面添加对应的多页,并为每个页面添加Chunk配置。
chunks: [‘app2′]中的app对应的是webpack.base.conf.js中entry设置的入口文件
plugins:[
    // https://github.com/ampedandwired/html-webpack-plugin
    // 多页:index.html → app.js
    new HtmlWebpackPlugin({
      filename: 'index.html',//生成的html
      template: 'index.html',//来源html
      inject: true,//是否开启注入
      chunks: ['app']//需要引入的Chunk,不配置就会引入所有页面的资源
    }),
    // 多页:index2.html → app2.js
    new HtmlWebpackPlugin({
      filename: 'index2.html',//生成的html
      template: 'index2.html',//来源html
      inject: true,//是否开启注入
      chunks: ['app2']//需要引入的Chunk,不配置就会引入所有页面的资源
    })
]
run build 编译
- 修改
config/index.js
打开config/index.js,找到build下的index: path.resolve(__dirname, ‘../dist/index.html’),在其后添加多页
build: {
    index: path.resolve(__dirname, '../dist/index.html'),
    index2: path.resolve(__dirname, '../dist/index2.html'),
},
- 修改
webpack.prod.conf.js
打开buildwebpack.prod.conf.js,在plugins下找到new HtmlWebpackPlugin,在其后面添加对应的多页,并为每个页面添加Chunk配置
HtmlWebpackPlugin中的filename引用的是config/index.js中对应的build
plugins: [
    // 多页:index.html → app.js
    new HtmlWebpackPlugin({
        filename: config.build.index,
        template: 'index.html',
        inject: true,
        minify: {
            removeComments: true,
            collapseWhitespace: true,
            removeAttributeQuotes: true
            // more options:
            // https://github.com/kangax/html-minifier#options-quick-reference
        },
        // necessary to consistently work with multiple chunks via CommonsChunkPlugin
        chunksSortMode: 'dependency',
        chunks: ['manifest','vendor','app']//需要引入的Chunk,不配置就会引入所有页面的资源
    }),
    // 多页:index2.html → app2.js
    new HtmlWebpackPlugin({
        filename: config.build.index2,
        template: 'index2.html',
        inject: true,
        minify: {
            removeComments: true,
            collapseWhitespace: true,
            removeAttributeQuotes: true
        },
        chunksSortMode: 'dependency',
        chunks: ['manifest','vendor','app2']//需要引入的Chunk,不配置就会引入所有页面的资源
    }),
]
参考链接:
https://segmentfault.com/a/1190000007287998
https://www.zhihu.com/question/41339583/answer/90614536
http://www.tuicool.com/articles/MBF3emR